Showing posts with label Decor. Show all posts

Monday, October 9, 2017

Office and Playroom Reveal

Over the past couple of years we’ve had so many home projects.  Our house was nice, but it needed a little work to spruce it up, and we wanted to really make it ours.  We changed out the dining room light fixture, bought new bedroom and living room furniture, built massive storage shelves in our garage, painted almost all the walls (many more than once due to a certain someone changing their mind), built 4 huge floating wood shelves for the living room, and ripped the carpet out of 5 spaces to put in hardwood flooring.  We did this all ourselves, which makes it feel even more like ours.  We put our time and sweat into this place. 

I like things organized and each time we take on another project it inevitably means that our house is a huge disaster for awhile.  When we refloored in the living room we had to level out the floor.  It was horrible and almost everything in the kitchen, living room, and hallway was covered in a thick, fine dust.  I thought it would take forever to get things cleaned.

We just finished a huge project; turning the cluttered office into an office/playroom.  The office had become a dumping ground.  We had random pieces of furniture and just kept adding things we didn’t have room for elsewhere.  We each had a desk, but both were typically covered in papers or things, making them impossible to use.  It was bad.  Luckily, I have pictures.


This summer, a month before school started, we decided it was time to do something about the office.  We also felt that Adeline needed a space other than the living room.  We decided that we needed a long desk and debated making it ourselves, but it was pretty clear that we don’t have the time to do this.  I figured I’d rather pay someone to make it and spend the time with our little girl.  

Mr. C moved everything out of the office the last week of July, a week before he had to go back to work.  He did the floor alone this time, finished in a couple days, and it turned out amazing!  The desk took awhile due to some changes, but we found someone who was reasonable and seemed to have great work.  We paid and waited.  In the meantime our hallway was full of stuff, our bedroom had random pieces, and a dismantled desk was by the living room.  It was a mess.  A stressful mess.  We bought a rug on clearance and found a chair also on clearance that was a final sale.  They sat in the empty room waiting to be used.  And then, at the end of September we got the desk and two matching floating shelves.

I drove home from work as the desk was being delivered, and I worried that it would look horrible.  We didn’t discuss what the cabinet doors would look like and I worried that we’d hate it.  I walked in and was floored.  It was so much better than I had imagined.  Over the course of the next couple of weeks we began bringing things back into the office.  I had to make some decisions about what to keep and what to let go, because I didn’t want anything in there that we didn’t really need or want.  This past weekend we finished the space, for the most part.  I still picture a little table and chairs for Adeline at some point, but for now we’re done. 

It’s a space I love more than I thought I would.  It’s actually my favorite place in the house, other than Adeline’s room.  The desk is beautiful, functional, and really perfect for what we needed.  The gallery wall pops on the teal wall.  The wall that used to hold the gallery wall is playful with letters spelling out “CREATE” and it’s the perfect space to display Adeline’s artwork.  It’s everything I hoped it would be, but so much more than I truly expected.


It’s so nice to finally have everything finished.  Well, almost….we still need to do the backyard.  And, a little bit to the front yard.  And organize the garage.  Okay, so maybe we’ll never be truly done, but the projects are definitely getting smaller at least.

Sunday, April 13, 2014

Easter Greenery

Easter is right around the corner and this year I thought I’d do something a little different to decorate.  Instead of buying the icky store basket filler, I decided to grow some of my own grass in baskets to decorate our entryway and use for Easter.   It took a little less than a week for the grass to fill in and get to the right height, so now would be the perfect time to make your own beautiful basket of grass to give as a gift or use as a centerpiece next weekend.

I received a few texts this morning of the snow covered ground in Nebraska, so I’m not sure if the people there will have as much luck, but if you live somewhere where the temperatures coincide with what April should be like and actually have a bit of sunshine, then I hope you give this a whirl!

Here’s what you’ll need:
-Sturdy Easter basket or pail
-Trash bag or plastic grocery bags
-Rocks for filler
-Potting soil
-Grass seed
-Easter eggs


You’ll want to begin by lining the baskets with plastic.  I cut liners out of a large clear plastic bag.  I love the baskets I used, however they did fade a bit out in the sun so keep that in mind when choosing your baskets.


Fill with potting soil and sprinkle seed on top.  I may have gone a bit um....overboard with the seed, but I knew I wanted VERY thick grass.


Give it a good watering and place in a sunny place.  You’ll want to keep the topsoil fairly moist so the grass sprouts.  I watered mine a couple times a day until I had good growth and then cut back to every few days as needed.

I found the sparkly eggs at Target at $5 for the pack and the bunny came from Home Goods.


Here’s a few pics of the candle holders I repurposed around our home with some natural filler and speckled eggs.


Monday, February 3, 2014

Hearts and flowers

I’m not quite sure how it’s February already but apparently it is.  The Centner house is full of pinks, reds, and lots of hearts this time of year.  After the Christmas decorations are put away it typically looks like we’ve been robbed because everything is so bare.  I’m always so thankful when I’m able to decorate for another holiday and Valentine’s Day is such a happy holiday!  Our anniversary is a week after V-day so the lovey decorations double for that as well.

I love decorating the shelves in our living room with whatever I can find around the house to tie in with whatever holiday is coming up.  I positioned some hearts into our greenery, strung some fabric garland and lights above our TV, and put some wedding momentos on the living room shelves.


Here’s a few pics of my favorite area, our mantle.


I have a pink and red heart runner on our kitchen table with a couple candles and some flowers.  These stargazer lilies are my absolute favorite flower and I can’t get enough of their sweet smell.  After a week of having them in the house I still remark how wonderful they smell everytime I walk by the table (I think it's driving Mr. C crazy).


Do you decorate for Valentine's Day? 

Sunday, October 27, 2013

Halloween Mantle Scarf


I saw this mantle scarf at Pier One and knew it would be the perfect addition to my Halloween mantle, however they were out of stock when I went into the store and I thought I could probably make my own.  My fabric was all on sale and although I'm not sure of my final project cost, it was definitely cheaper to make.  The time invested was more than I thought, but I love the outcome and loved that I was able to pick my own colors/patterns.

Photo Source: Pier One


Let me begin by saying that I am definitely not a sewing expert.  For most of the things I do I don’t have much of a pattern except what I make up, and I just make things up as I go.  I’m sure there’s an easier way than this, but it’s seemed to work well for me.  So, if you’re expecting technical sewing terms you definitely won’t find any in this post!  But, if I can do this, then anyone can!  I will say that the triangles look great, but the part on the mantle definitely has a bit of a homemade look, but that part is hidden and I figure perfection is overrated :)


Here's what you need:

-sewing machine 
-1/4 yard of 3 fabrics of varying color/patterns
-1 yard (or so) of a solid color fabric for 2 triangles, backing, and the section that sits on the mantle
-black thread
-cutting mat and rotary tool (scissors work too, but the rotary tool is amazing)
-pins
-iron

For my triangles I chose to do 2 sparkly orange with a web pattern, 2 sparkly purple, 3 black with orange polka dots, and 2 plain black. 

I began by cutting my triangles and black backing by using the following measurements

Smaller triangles (orange and purple) - 8" wide x 14" long
Medium triangles (black) - 8" x 16"
Large triangles (black with orange polka dots) - 8" x 18"
***remember to cut backing of the same size for all of these**

I then pinned each triangle to the backing of the same size.  You want the "good" sides of the fabric facing inward so it looks like the triangle is backwards.  Pin.  Somehow I managed to not poke myself with a pin during this entire project.  That's a miracle in itself.


Now it's time to start sewing.  I sewed the angled sides and left the top of the triangles open.  After sewn, turn them inside out (which brings the "good" fabric on the outside).  I had to use scissors to push the ends of the triangle out.
Then I ironed the triangles so the edges were crisp and wrinkles gone.
Then I lined up the triangles in the pattern I wanted and cut a plain black piece of fabric a couple inches longer on each side (I don't have an exact measurement for this since it will depend on the pattern you lay out).  I then measured the width - my mantle is 7” wide so I cut the black piece of fabric about 6” wide, but again this depends on your personal preferences and mantle.
Hem a long edge of the fabric.
Then I pinned the top of the medium and large triangles onto the hemmed side of the fabric and sewed them on in a line.  

I added the second row of the small triangles, pinned, and sewed. 

You could just finish the ends of the black piece and be done, but I ended up folding the other unhemmed edge under so it met the edge of where I had sewn the triangles, turning the corners in, and sewing that all together.  Everything looked more finished this way and the part on the mantle was a bit sturdier. 
Here’s the end result!  I love it!


And here’s my favorite little painted pumpkin.  It still makes me smile everytime I see it!


Did you decorate or paint any pumpkins for Halloween? 

Friday, October 18, 2013

Polks dots and Pumpkins

Last year I had this wonderful idea of decorating our entryway with a huge spider web, little spiders, and pumpkins.  I saw a chevron painted pumpkin on pinterest and it looked easy enough.  I decided to make it and blog about it.  Do you all remember that blog?  No?  Well, that’s because it never happened because it was so horrible!  I taped my pumpkin and went a bit crazy with the spray paint.  I didn't quite understand the concept of many light layers and instead sprayed a lot all at once.  The result was a sticky mess of a chevron wannnabe pumpkin.  I ended up painting the entire thing white to disguise the failed chevron and a couple weeks later we started noticing a horrible smell.  It was the decaying scent of my white pumpkin.  I think it decayed so fast because of the very thick coat of spray paint combined with the sun.  I wrote it off as an epic fail and gave up on my Martha Stewart-like front porch.  I had also put up lights and the web but I just wasn't feeling it.

This year I decided to have another go at it, but without a chevron pumpkin.  Over the course of a week I collected a bunch of different types and sizes of pumpkins.  On Sunday Coconut and I went outside armed with glue, glitter, paint, and our pumpkins.  I've seen the mess glitter makes and I figured the outdoors could benefit from some extra sparkle. 

I painted polka dots on various pumpkins using Martha Stewart’s rose gold paint and foam pouncers.  Gold and polka dots have been catching my eye so I was smitten with these. 


This one was so pretty I put it on our coffee table.  I think it’s so pretty with the long stem too.


And then came the messy part.  I glittered some pumpkins, starting with gold glitter and moving on to a greenish glitter.  I used Martha Stewart glitters as well.  I love how fine the glitter is and the colors are really beautiful.  If you haven’t caught on yet, I really really like most of the Martha Stewart crafting products and it seems like every store is selling them these days.

I glittered some stripes using the pumpkin’s natural lines.


Tried an ombre effect that didn’t quite pan out due to sticky glue fingers.


And just covered others.  This green one is Mr. C’s favorite.  I think it’s because of the color and not because of all that glitter.


This one to the left of the pot was lightly brushed with gold glitter and a touch of gold paint.


And here’s the end result!  It’s exactly what I wanted!  We strung some purple, orange, and white LED lights around the door, put up the biggest spider I've ever seen (scared me to death when I forgot and opened the blinds), strung the web in a more fitting spot, and I hung up the wreath I made last year. 


Sources: Orange metal pots- Marshalls, Large spiderLarge spider web, and other spiders- Pier One, Wreath- DIY’d, Hay bale- Joannes, Lights- Target.

Tuesday, October 15, 2013

Upcycling pots

Over the years we've accumulated a fairly large collection of pots.  I love bright, fresh flowers and because I can’t narrow down my selections to just a few, we end up buying a bunch of random flowers.  We plant them in pots because the AZ soil isn't exactly the best for growing much.  The plants come in those cheap, ugly pots and we always re-pot them in bigger, pretty pots.  That leaves us with a lot of those cheap, ugly pots.  I never knew what to do with them and I’d end up recycling them or throwing them away.  Finally I have found a way to use them!

While we were at sprouts this weekend I found some beautiful mums that needed a home.  Lucky for them, I thought they’d look great in my outdoor pumpkin explosion/Halloween display. 
While looking through our pots, I found a faded large plastic pot that needed some sprucing up.  I spray painted on a couple coats of gold paint and let it dry for a good hour.  Then I painted “BOO” on it using some black Martha Stewart paint and sponges.  I got the stencils at Michaels, no idea what brand they are, but I love them. 

Here's what I started with


And ta da.....


The best thing was that I already had everything on hand, so my new BOO pot was free!


I’ll be posting pics later this week with the rest of my outdoor holiday decor!

Monday, April 29, 2013

Fabric Flower Wreath


I have a bit of a wreath obsession.  I recently realized I didn’t have one for spring/summer which is of course a huge problem.  I’ve been itching to make one of those yarn wreaths that have been popping up all over pinterest and I figured this was a great opportunity for that. 


Here’s what you’ll need:
-foam wreath form
-yarn
-felt scraps
-fabric scraps (I used a combo of scraps and some quilting squares you can usually pick up for around $2)
-buttons for the center of the flowers
-hot glue gun


Wrap the form completely in yarn.  I did this while watching TV and it went pretty quick.  To start, I looped the yarn around and tied a knot, continued wrapping, and when I finished I tied another knot in the back of the wreath.

For the flowers you’ll need to cut out 8 equal circles for the base and 8 smaller circles for the center (I used a stencil, but as long as your fabric is semi-circle shaped that’s just fine).  You can cut more or less circles, depending on how full you want your flower.  You’ll also need a small felt circle.  The felt acts as your base so you just need it large enough to be able to glue the tips of the base petals on.


For each circle, fold it in half, then half again.  You just glue this onto the felt circle.  Mine halfway overlapped since I used 8 circles.  Repeat with the second set of circles and finish with a pretty button on top.  When I was finished I glued inside some of the “petals” as necessary.


For each circle, fold it in half, then half again.  You just glue this onto the felt circle.  Mine halfway overlapped since I used 8 circles.  Repeat with the second set of circles and finish with a pretty button on top.  When I was finished I glued inside some of the “petals” as necessary.

I varied the size of my three flowers but you can really do whatever floats your boat.

I chose to pin my flowers onto the wreath so I can swap them out as the seasons change, but you could also glue it if you’d prefer.


That’s it!  It would be pretty to hang with a piece of burlap or ribbon too.

Friday, December 14, 2012

Oh Christmas Tree


Oh my goodness.  I had half a post written and I really was going to publish it but then I had a surprise party for Mr. C. that sucked up about a month of my time, and then I was in Christmas decorating mode, and then Thanksgiving happened (yes, this is in chronological order and Christmas decorating did occur before Thanksgiving for this year only), and then I geared up for the magicalness of Black Friday, and then I took a weekend to finally clean the house and relax a bit and now here we are and you never got to read the post.  But, I wrote you a new one with Christmasy stuff so you really aren't missing out on anything.

We took advantage of my parents being in town in November and recruited them for some Christmas decorating help.  My dad and Mr. C did the outside of the house with some little lights on the trees and the big ceramic bulbs around the roofline.  it makes me so happy when I get home!  My mom and I did a lot of the inside of the house and it was so nice to decorate with her again.  I was ready to change things up a little bit this year and it was very helpful to have another decorator to try things out I hadn't thought of.  My parents had never been in town when our Christmas stuff was up so it was really nice to be able to enjoy the decorations together for a couple days.


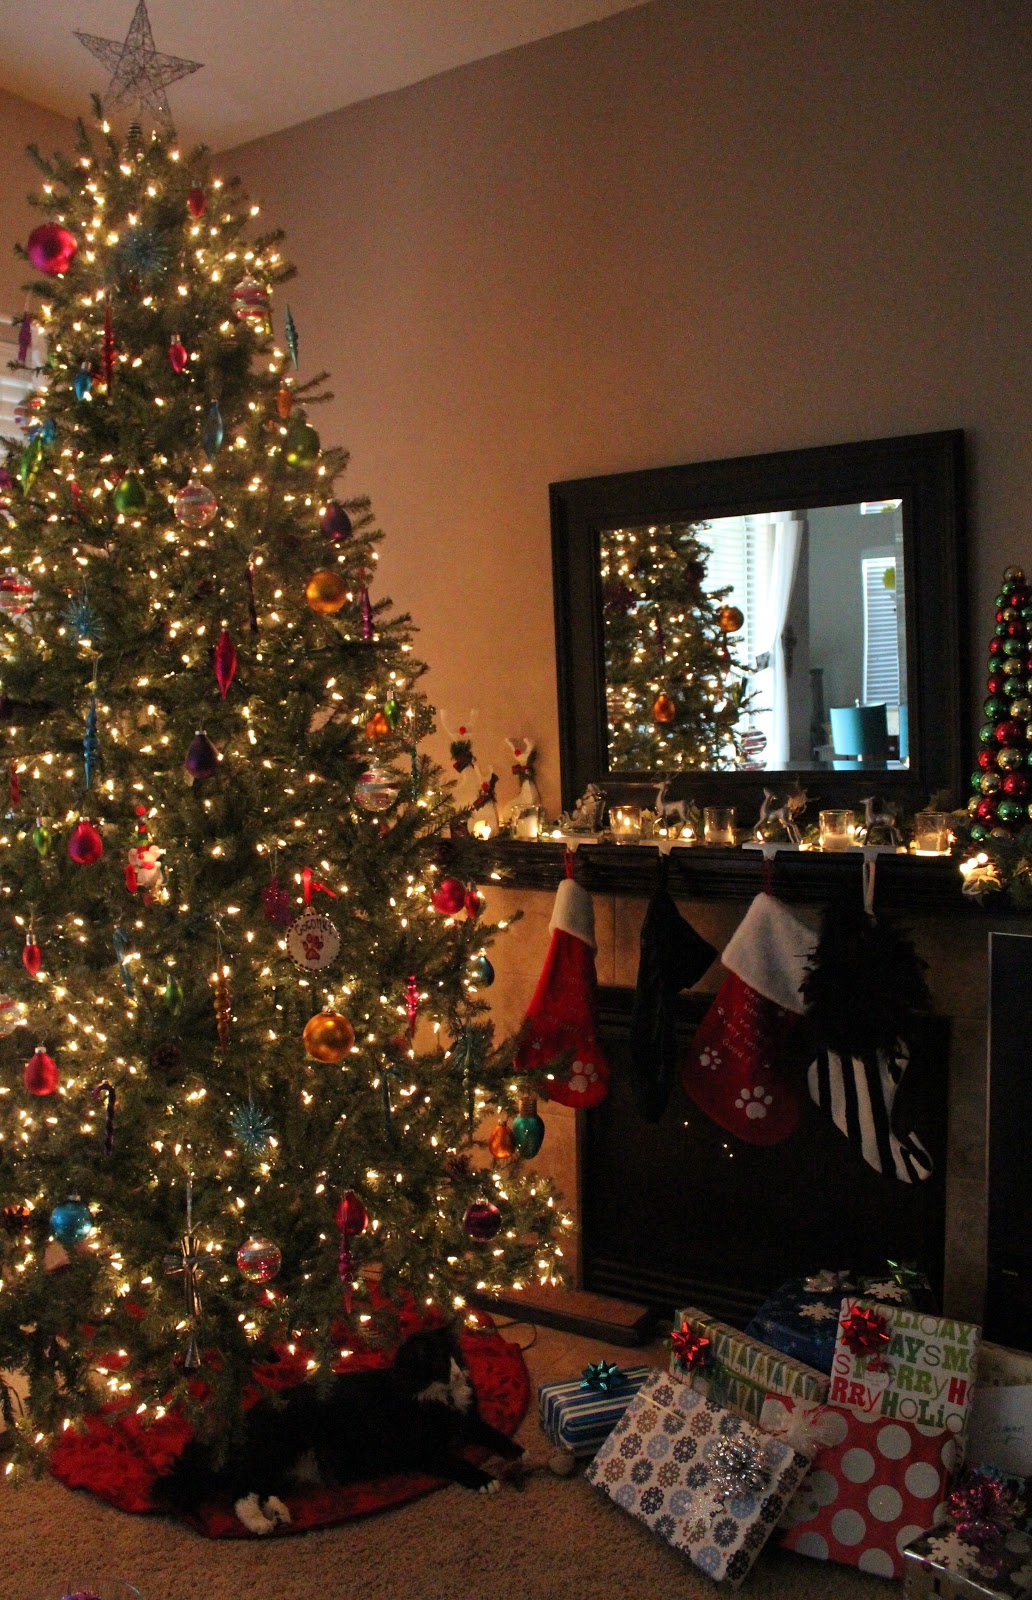
Oh pretty Christmas tree, how we love you!  We have a very large 9 ft. tree which Oreo has claimed as his own.  He also thinks the ornaments are strategically placed toys for him.  He's finally stopped batting at ornaments so much because he's moved onto chewing on my pretty wrapping paper.  Whose idea was it to get a cat anyhow???  Oh that's right....it was mine.  And if you're wondering why we don't put the presents under the tree like normal people, it's because Oreo is training us to do what he wants and apparently it's working.


Above the TV stand is some garland and our nutcracker collection.  We bought our first one when we went to the Nutcracker ballet and it's been a tradition since.  I love how unique they all are and for some reason they don't creep me out the way some nutcrackers do.


I did a little more decorating in our bedroom this year.  I added an extra mistletoe ball over the bed and wove some garland into the headboard.  We switched out our bright pillows and white duvet cover for the thicker, green duvet we use for the winter, and I'm really love looking at the bed all made up now with the decorations.  I also hung the "Merry Christmas" garland I made last year for our photos over the bed.


The tree in our bedroom is much smaller than our main one, but I love it because it holds most of our special ornaments.  Every year I usually get at least one ornament that represents something that happened that year. I love putting the ornaments on this tree because it brings back memories and each one really is so special to me.


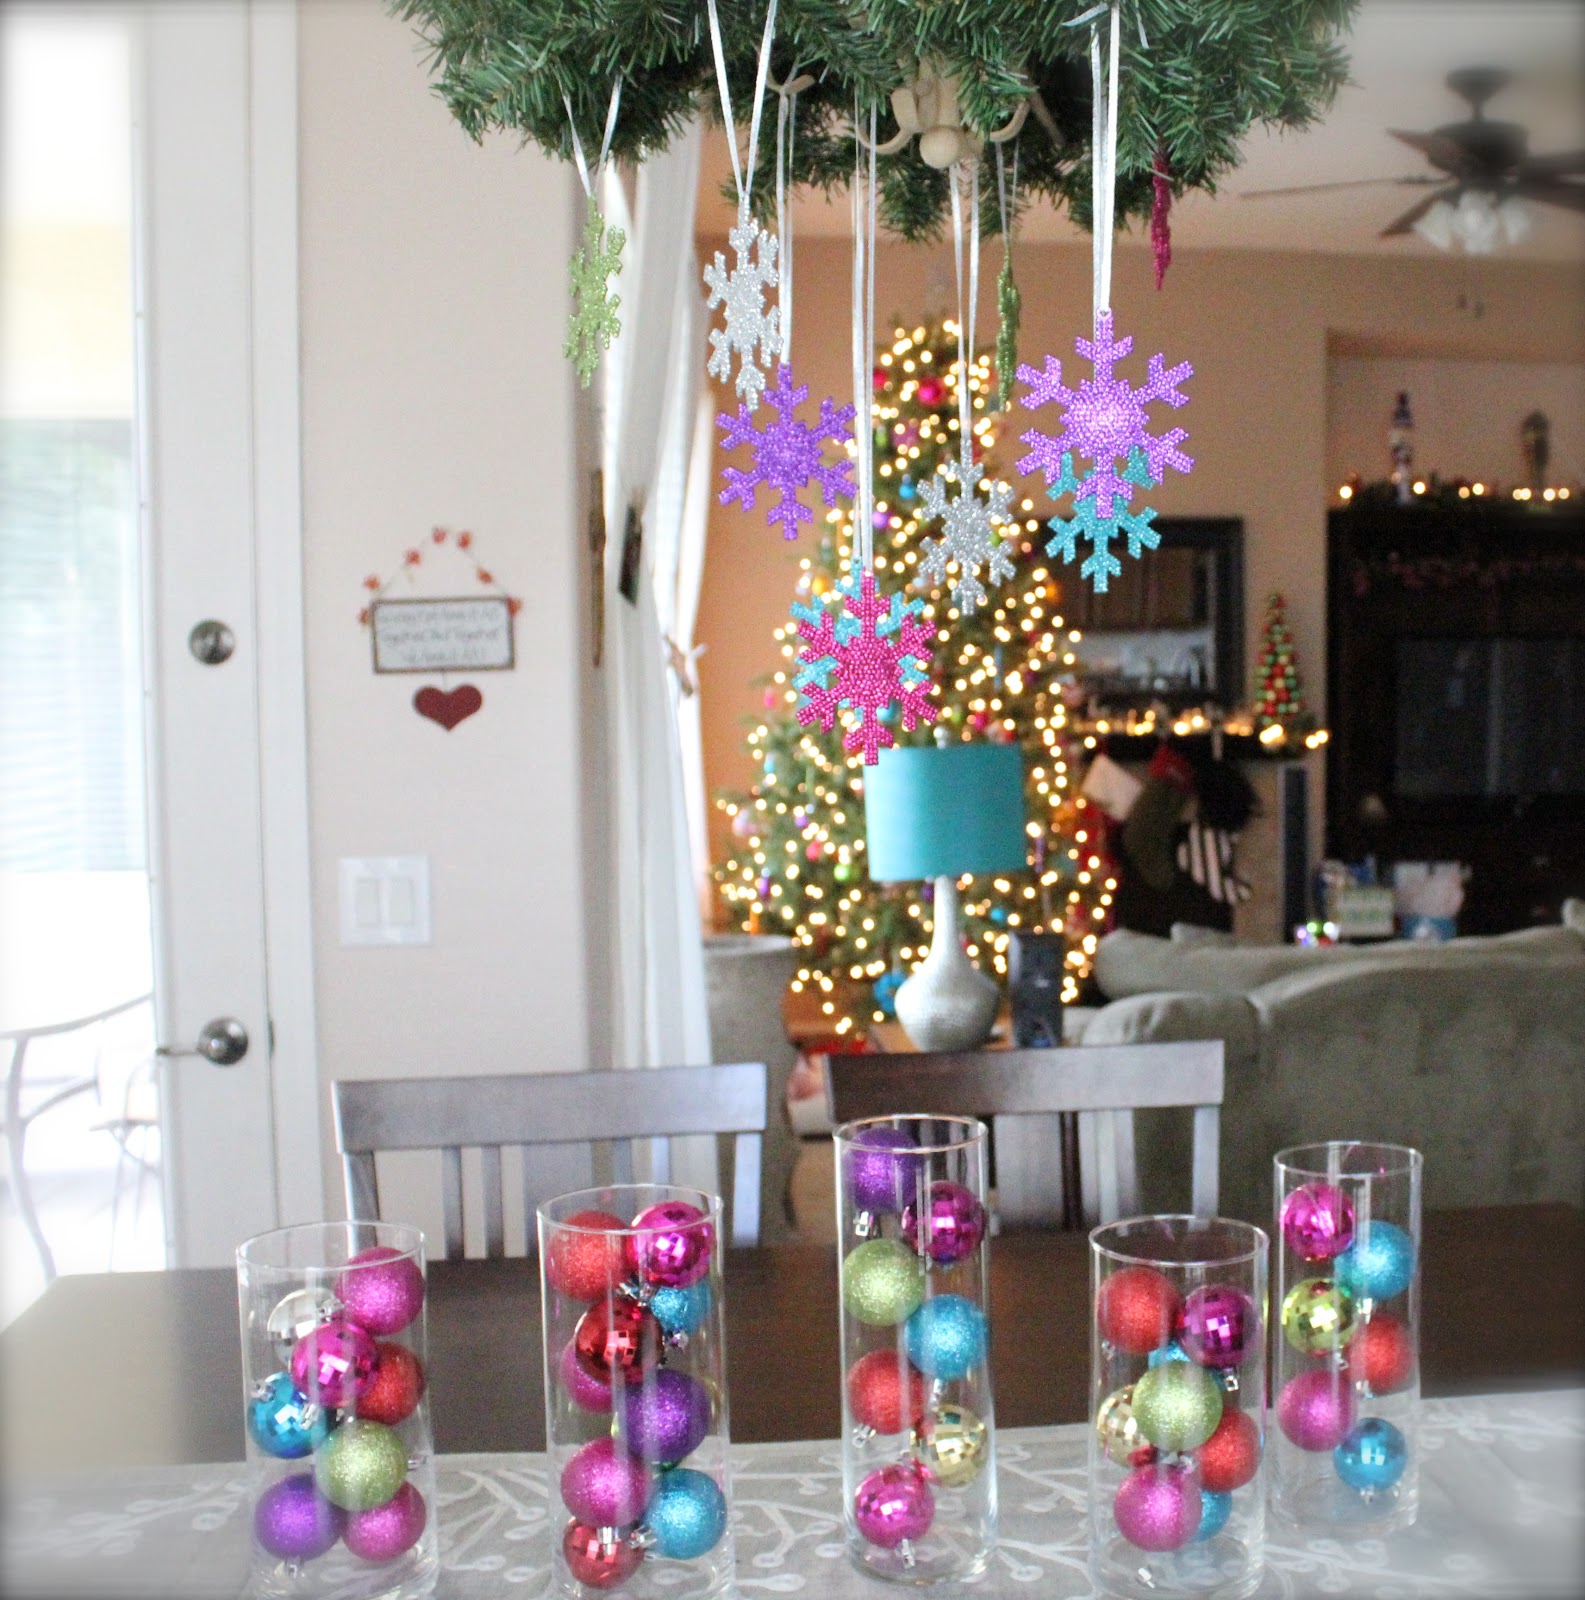
I decided to make a new table centerpiece this year and made this for under $15!  


The ornaments in the middle came from Target's $1 section.  I already had the glass containers from our wedding centerpieces.  I found the greenery at Michaels for $1.99 and the snowflake ornaments were .50 each.  I cut off the thin hangers on the snowflakes and used ribbon to make them various heights.  It ties in perfectly with the colors on our tree too which I’m pretty darn excited about.

I hope you have your decorations up and are ready for Christmas!